

Table of Contents
The Sensory Awakening
I vividly remember the muffled, mushy thud of my old office keyboard. It felt like typing on wet sponges. Then, I touched my first bespoke deck. The crisp, metallic snap echoed through my fingers, and I was hooked. Exploring custom mechanical keyboard building for beginners isn’t just about hardware. It is a quest for a better sensory life.
When you start with DIY tactile peripherals, the world of computing changes. Your desk becomes a sanctuary of sound and feel. I found that bespoke typing decks turned my grueling emails into a rhythmic dance. Each press provided a tactile confirmation that my old keyboard lacked. This was my entry into modular keyboard assembly.
The ASMR of the Home Office
In 2026, we spend hours at our desks. Why should that experience be silent and sterile? I started building because I wanted my work to have a soundtrack. The deep “thock” of a well-lubed switch is like acoustic therapy. It provides a grounding physical feedback in a digital world.
Building your own board is a meditative process. I spent my first Sunday afternoon carefully snapping switches into place. The stress of the week melted away with every “click.” You aren’t just assembling a tool. You are crafting a signature sound that belongs only to you.
Why ‘Standard’ Isn’t Enough Anymore
Mass-produced keyboards are designed for the average user. But you aren’t average. My journey taught me that “good enough” was actually holding back my productivity. A custom board responds to the specific weight of your fingers. It honors the way you move.
Once you feel the difference, there is no going back. The plastic rattliness of a standard board becomes unbearable. I will show you how to find your perfect “clack.” We will transform your desk from a place of work into a place of play. This is the ultimate upgrade for your digital life.
The Anatomy of the Sound
Before you buy a single part, you must understand the “switch.” This is the heart of custom mechanical keyboard building for beginners. I remember being overwhelmed by the rainbow of colors—reds, browns, blues. Each color represents a different physical behavior. Mastering DIY tactile peripherals starts with your fingertips.
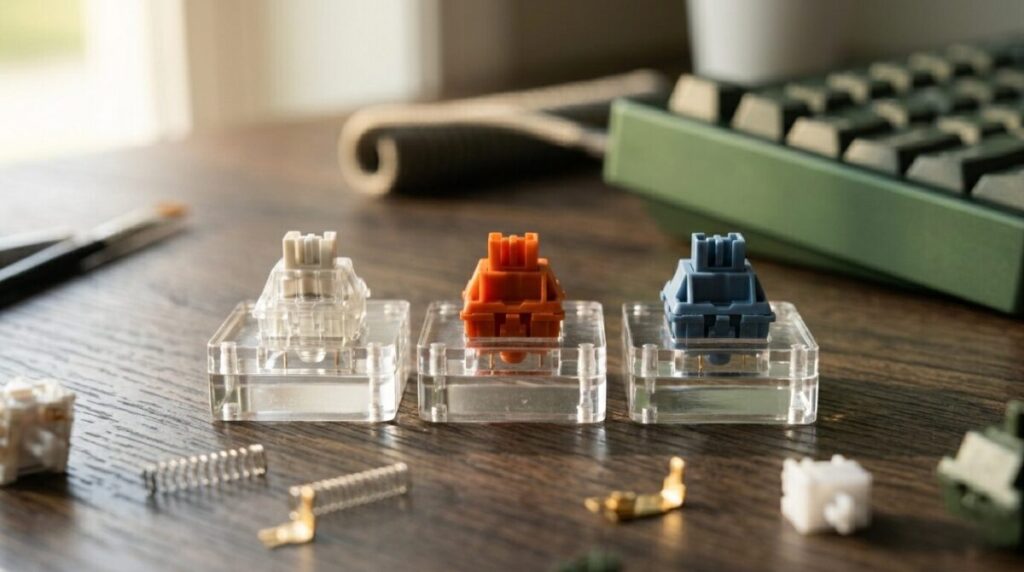
I chose a linear switch for my first build. It felt smooth, like gliding on ice. Others prefer a tactile bump to signal a keypress. This is the core of modular keyboard assembly. You are choosing the literal friction of your digital life. I quickly learned that bespoke typing decks are defined by this choice.
Decoding the Switch: Linear, Tactile, and Clicky
Linear switches are the quiet achievers. They offer a consistent, smooth press from top to bottom. I use these for late-night writing sessions. Tactile switches, however, provide a small “bump.” This feedback tells your brain the key has registered. It’s a rhythmic, satisfying sensation.
Clicky switches are the extroverts of the keyboard world. They provide both a bump and a sharp “snap” sound. My office mates hated them, but I loved the typewriter feel. Your choice depends on your environment. I found my “Goldilocks” zone in a heavy tactile switch. It felt substantial and deliberate.
The Science of the ‘Thock’ vs. the ‘Clack’
In the community, we obsess over “thock.” This is a deep, creamy, bass-heavy sound. It usually comes from high-quality plastic and foam dampening. A “clack,” conversely, is higher-pitched and metallic. I spent hours watching sound tests before my first build.
Achieving that perfect acoustic profile is an art. I experimented with different plate materials like brass and aluminum. Brass is stiff and musical. Aluminum is balanced and crisp. Every layer of your board acts as a sound chamber. You are essentially building a musical instrument for your desk.
The Builder’s Toolkit
Building your first deck requires more than just a screwdriver. It requires a specific set of instruments designed for precision. I remember looking at my first pile of parts—tiny springs, clear housings, and gold-plated stabilizers. This is where custom mechanical keyboard building for beginners becomes a craft.
Your journey into DIY tactile peripherals starts with the PCB (Printed Circuit Board). In 2026, I always recommend a “hot-swappable” board. This allows you to change switches without a soldering iron. It makes modular keyboard assembly accessible and forgiving. I found that bespoke typing decks are much easier to maintain this way.
The Chassis: Case Materials and Mounting Styles
The case is the “body” of your instrument. I transitioned from a light plastic case to a heavy, CNC-machined aluminum frame. The weight alone changed the experience. It felt like an anchor on my desk, solid and unmoving. I also chose a “gasket mount” system for my second build.
Gasket mounting uses small rubber pieces to cushion the internal plate. This creates a “flexible” typing experience. It absorbs the impact of your fingers, preventing fatigue. I noticed I could type for hours without the usual joint soreness. This is the ultimate comfort upgrade for any professional writer.
Keycaps: PBT vs. ABS and the Final Touch
Keycaps are the only part of the board you actually touch. I used to think all plastic was the same. Then, I felt the textured, grainy surface of “Double-shot PBT.” These caps never get shiny or greasy over time. They feel premium, like high-quality stationery.
ABS caps, on the other hand, are known for their vibrant colors and crisp legends. They produce a higher-pitched “clack” that some enthusiasts love. I personally prefer the thick, thudding sound of PBT. It’s the finishing touch on your modular keyboard assembly. Choosing the right profile—like Cherry or OEM—changes the literal height of your keys.
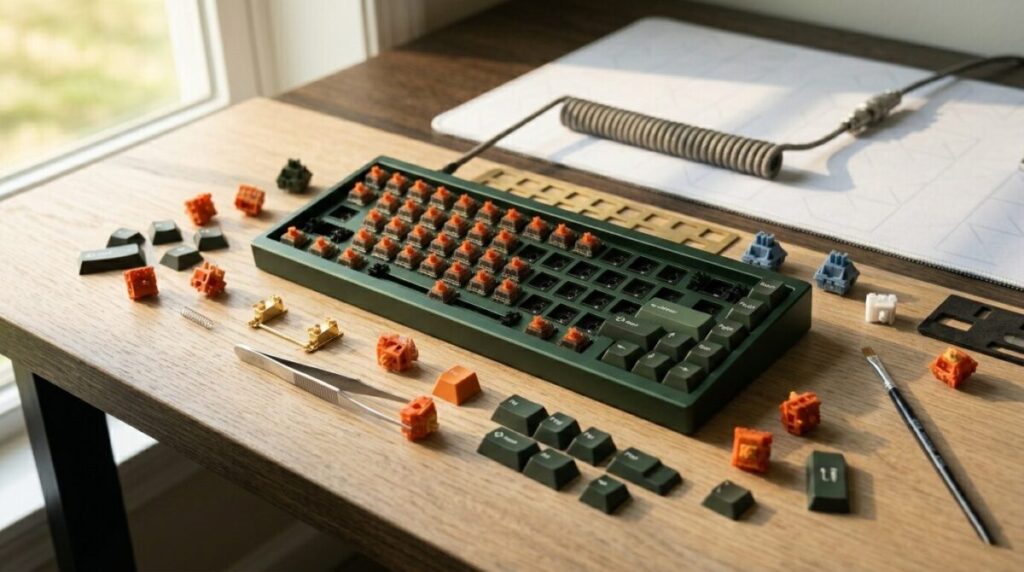
The Assembly Ritual
The moment of assembly is where the transformation happens. I cleared my desk, laid out a silicone mat, and organized my switches into neat rows. This is the most meditative part of custom mechanical keyboard building for beginners. It requires a steady hand and a patient mind. I found that rushing through modular keyboard assembly leads to bent pins and frustration.

I started by testing my PCB then I plugged it in and used a pair of tweezers to trigger every key on the screen. This ensures the “brain” of your bespoke typing decks is functioning before you build around it. Once the lights flashed green, I moved on to the most important secret of the hobby: lubing the stabilizers. This is the hallmark of DIY tactile peripherals.
The Art of the Lube: Killing the Rattle
Nothing ruins a premium build like a rattling spacebar. I applied a small amount of specialized grease to the metal wires of my stabilizers. This eliminates the “ping” and “tick” that plague cheap, store-bought boards. It turns a plastic clatter into a solid, muted thud.
I remember the first time I pressed my lubed spacebar. It felt heavy, smooth, and expensive. This small, tedious step is what separates a “keyboard” from a “piece of art.” You are tuning the acoustics of your workspace. It takes time, but the silence is your reward.
The Final Crowning: Seating the Keycaps
Seating the switches into the plate is the most tactilely satisfying part of the process. I listened for the distinct “click” as each housing snapped into the frame. Then came the “crowning”—pressing the keycaps onto the stems. I chose a deep forest green set to match my desk plants.
As the final Esc key clicked into place, the board felt complete. It had weight, personality, and a specific gravity that felt permanent. I sat back and looked at the modular keyboard assembly I had just finished. It wasn’t just a peripheral anymore. It was a physical manifestation of my own taste and effort.
Beyond the Board
Stepping away from the workbench and finally plugging in your creation is a moment of pure digital triumph. I felt a surge of pride as the RGB underglow spilled across my desk for the first time. This is the ultimate payoff of custom mechanical keyboard building for beginners. You aren’t just using a tool; you are interacting with a piece of your own engineering.
I found that my relationship with my work changed once I moved to bespoke typing decks. The fatigue in my wrists vanished, replaced by a rhythmic, musical flow. This is the hidden health benefit of DIY tactile peripherals. You are no longer fighting against a stiff, cheap membrane. You are dancing across a surface tuned specifically for your strength.
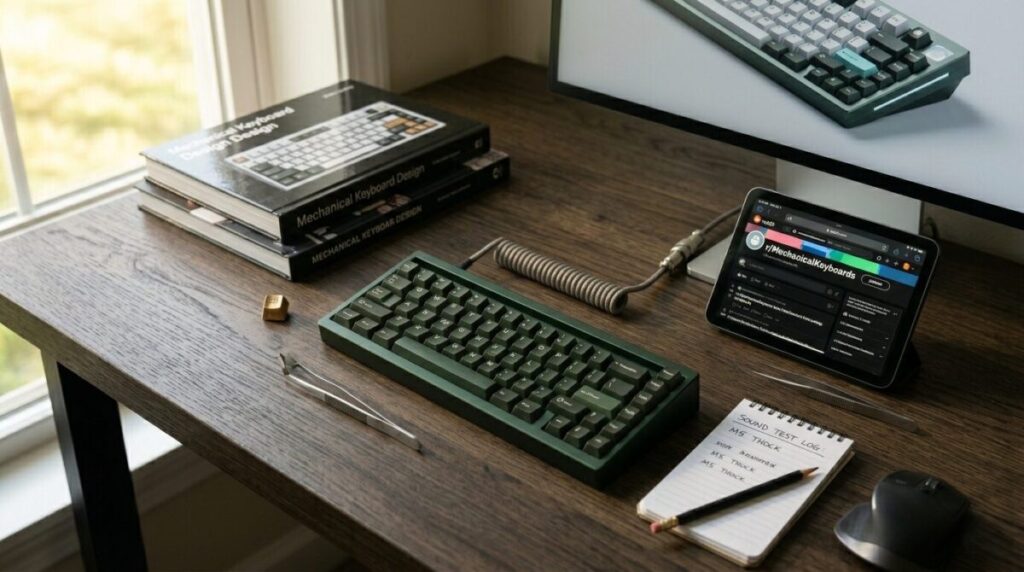
Joining the Global Typing Community
In 2026, the hobby is more than just hardware; it is a thriving global culture. I spent my first few weeks sharing “sound tests” online and trading keycap sets with collectors. This community aspect of modular keyboard assembly adds a layer of social joy to your desk. You realize that thousands of others are also chasing that perfect “thock.”
I began attending local “meetups” where I could feel the weight of a brass-weighted board or the texture of exotic wood cases. These gatherings are the heartbeat of the hobby. You learn new mods, like the “Tape Mod” or “Holee Mod,” to further refine your sound. Your first build is rarely your last; it is the gateway to a lifelong pursuit of tactile perfection.
The Long-Term Joy of a Personalized Tool
A standard keyboard is a disposable plastic object. A custom mechanical board is an heirloom. I have serviced mine twice in three years, cleaning the switches and re-lubing the stabilizers to keep it fresh. It has aged with me, becoming a permanent fixture of my creative life. This sustainability is a core part of the bespoke typing decks philosophy.
When you build it yourself, you have the power to fix it. You are no longer at the mercy of planned obsolescence. My board is a testament to my own style and my commitment to quality. I invite you to clear your desk and start your own build. Your fingers—and your ears—will thank you for the upgrade.