

Table of Contents
I remember the exact moment my relationship with photography changed. I was standing on a pier, the sun dipping just below the horizon, painting the sky in a bruised palette of violet and gold. My smartphone was in my hand, and I was doing what we all do: I was “machine-gunning” the sunset. I took forty-five photos in sixty seconds. I didn’t look at the sky; I looked at the screen to see if the sky looked like the sky.
When I got home, I had a digital gallery of near-identical images. I felt nothing. There was no memory of the wind on my face or the smell of the salt spray—just a folder of data.
A week later, I found my grandfather’s old Pentax K1000 in a shoebox. It was heavy, cold, and smelled faintly of machine oil and old leather. I bought a single roll of 35mm film, loaded it with trembling fingers, and went back to that same pier. This time, I only had 36 chances. I didn’t take forty-five photos. I took one.
That was the day I stopped taking “content” and started making photographs. This is the “slow” magic of analog, and if you’ve been feeling the itch to disconnect from the digital hive-mind, this is your roadmap.
Part 1: The Anatomy of the Image (How It Actually Works)
To appreciate film, you have to understand that it isn’t software; it’s chemistry. In a digital camera, a sensor records light as a series of ones and zeros. In an analog camera, you are witnessing a physical, microscopic transformation.
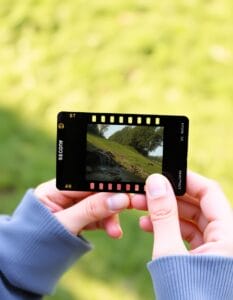
The Film: A Sandwich of Science
A strip of 35mm film is a marvel of engineering. It consists of a flexible base coated with an emulsion. This emulsion contains millions of light-sensitive silver halide crystals.
- The Exposure: When you press the shutter button, the “curtain” inside the camera opens for a fraction of a second. Light hits these silver crystals.
- The Latent Image: The light causes a chemical change in the crystals, creating a “latent image.” It’s there, burned into the silver, but it’s invisible to the naked eye until it hits the chemicals.
- Grain vs. Pixels: Digital photos are made of square pixels. Film is made of organic, irregular grains of silver. This is why film looks “creamy” or “warm”—it’s literally a physical texture.
The Camera: The Light-Tight Box
At its core, every film camera—from a $5,000 Leica to a $10 thrift store find—is just a light-tight box.
- The Aperture: The opening in the lens that controls how much light gets in.
- The Shutter: The gate that controls how long the light hits the film.
- The Focus: The physical movement of glass elements to sharpen the light onto the film plane.
When I first used a fully manual camera, I felt a surge of panic. There was no “Auto” mode to save me. But that’s the secret: when you control the light yourself, you finally understand what a photograph actually is.
Part 2: The Gear—Starting Your Analog Journey
You don’t need to spend a fortune to start. In fact, some of the best “soul-searching” photography happens on the simplest gear.
Choosing Your Format: Why 35mm?
For beginners, 35mm is the gold standard. The rolls are easy to find, relatively affordable to develop, and the cameras are portable. You’ll see the “35mm” designation everywhere—it refers to the width of the film strip, including the sprocket holes that pull the film through the camera.

The “Big Three” Beginner Cameras
If I were starting over today, I would look for these mechanical workhorses:
- The Pentax K1000: Often called the “Student Camera.” It is entirely mechanical. It doesn’t even need a battery to fire the shutter. It’s built like a tank and forces you to learn the fundamentals.
- The Canon AE-1: A classic with a cult following. It offers “Shutter Priority” mode, which helps if you’re worried about moving too fast, but still gives you that vintage tactile feel.
- The Olympus OM-1: This was my second camera. It’s incredibly compact and has a massive, bright viewfinder. Carrying it feels like carrying a piece of jewelry that just happens to take world-class photos.
Understanding Film Stocks (The “Vibe” Selector)
In the digital world, you use “Filters.” In the analog world, you choose your “Stock.”
- Kodak Portra 400: This is the gold standard for portraits. It has a warm, golden-hour glow that makes skin look incredible.
- Fujifilm Superia: This stock leans into the greens and magentas. I love it for street photography and moody, overcast days.
- Ilford HP5: The king of Black and White. It’s gritty, has beautiful contrast, and is incredibly “forgiving” if you mess up your exposure.
Part 3: The Darkroom—Where the Ghost Appears
The most transformative experience of my life happened in a room lit only by a dim red bulb. This is the Darkroom. While many people today drop their film off at a lab (which is totally fine!), understanding the process is essential to the “Encyclopedia” of photography.
Step 1: Developing the Negative
You take your exposed roll of film into total darkness and wind it onto a reel inside a light-tight tank. Then, you pour in a series of chemicals:
- The Developer: This turns the “latent” image into visible silver. The longer you leave it in, the darker the image gets.
- The Stop Bath: An acidic solution that instantly “freezes” the development process.
- The Fixer: This makes the film no longer light-sensitive. Once this step is done, you can turn on the lights. Seeing your negatives for the first time—clear strips of plastic with ghostly images on them—is a high no drug can match.
Step 2: Making the Print
To get a photo you can hold, you use an Enlarger. It’s essentially a projector that shines light through your negative onto a piece of light-sensitive paper.
- You “dodge” (block light) to make areas lighter.
- You “burn” (add light) to make areas darker. It is a physical, hand-crafted dance with light. When you slide that white paper into the developer tray and see the image slowly fade into view, it feels like magic. It is magic.
Part 4: The “Slow” Philosophy—Why We Wait
In a world of instant gratification, why would anyone wait three days to see a photo? Because waiting creates value.
The 36-Frame Limitation
When I have 10,000 photos on my phone, none of them matter. When I have 36 frames on a roll, every single one is a decision. I find myself standing still, waiting for the person to walk into the frame, or waiting for the wind to die down. I am no longer a “content consumer”; I am a witness.
The Lack of a “Preview”
On a digital camera, we do something called “chimping.” We take a photo and immediately look at the back of the camera. We aren’t in the moment; we are in the review. With film, there is no screen. You take the shot, you cock the lever, and you move on. You have to trust yourself. This trust builds a level of confidence in your creative eye that digital photography simply cannot teach.
The Physicality of Memory
I have digital photos from ten years ago that I haven’t looked at once. But I have an old shoebox of 4×6 film prints that I flip through every few months. I can feel the texture of the paper. I remember the weight of the camera. The physical nature of film turns a “capture” into an “object.”
Part 5: How to Get Started This Weekend
If you’re ready to take the plunge, don’t overthink it. Here is the step-by-step “Analog Reset”:
Find a Local Lab: Search for “Film Processing Near Me.” Supporting local labs is how we keep this hobby alive!
Find a Camera: Check your parents’ attic or a local thrift shop. Look for “Manual SLR” (Single Lens Reflex).
Check the Seals: Open the back. If the black foam around the edges looks like gooey tar, it needs replacing. This is a 10-minute fix with some craft foam and glue.
Buy “Consumer” Film: Don’t start with expensive professional stocks. Buy a 3-pack of Kodak Gold or Fujifilm 400.
Shoot a “Test Roll”: Go out and take photos of everything. Note down your settings for each shot. When you get the photos back, you’ll see exactly what worked and what didn’t.